The Northern Lights, also known as Aurora Borealis, are a mesmerizing natural phenomenon that many people dream of seeing and photographing. As a first-time photographer, you may be wondering how to photograph the Northern Lights and capture this once-in-a-lifetime experience. Even without a tripod or fancy equipment, you can create stunning images that showcase the beauty of the northern lights.
In this blog post, I’ll discuss everything you need to know to see and photograph the Northern Lights, including where to go, the best time of year to see them, the necessary conditions, what equipment to bring, and the camera settings you need to capture the perfect shot. Whether you’re an experienced photographer or just starting, this guide will help you prepare for the ultimate Northern Lights adventure.
How to See the Northern Lights
First thing is first – to photograph the Northern Lights, you actually need to see the Northern Lights!
Where can I see the Northern Lights?
The Northern Lights, also known as Aurora Borealis, can be seen in the northern hemisphere. Countries in the Arctic Circle, such as Finland, Norway, Greenland, or Upper Canada, are particularly known for the chance to experience the Northern Lights. However, during intense solar storms, the Northern Lights can be seen much further south. For example, in late February 2023, the Northern Lights could be seen at Stonehenge in the UK and New York in the United States!
I personally experienced the Northern Lights in Iceland in 2022 and 2023. Iceland has many natural experiences on offer, which is why it was my top choice to try and see and photograph the Northern Lights.
What time of year can I see the Northern Lights?
Once you’re in the northern hemisphere, you can see the Northern Lights from late August to mid-April. The best time to see the Northern Lights is during the winter months when there are long periods of darkness. I saw the Northern Lights in Iceland both in November 2022 and February 2023. This increased chance is because there are the least hours of daylight from November to February, which means you have a higher chance of seeing the Northern Lights during this time.
What conditions are needed to see the Northern Lights?
The Northern Lights, also known as Aurora Borealis, are caused by charged particles from the sun colliding with particles in the Earth’s atmosphere. To see the Northern Lights, you need the following conditions:
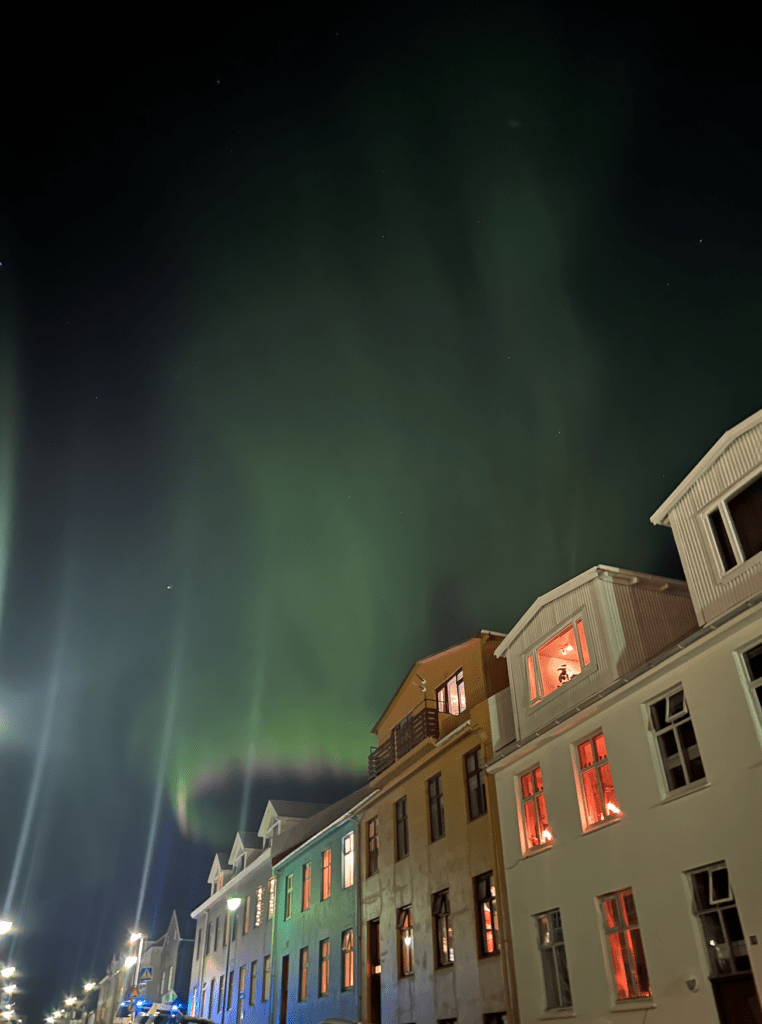
- Dark skies – The Northern Lights are visible when the sky is dark, so you need to be away from light pollution. This means going to remote locations or areas with minimal light pollution. While you can see them in cities, such as Reykjavik in Iceland, they will still be more difficult to see than with a dark sky.
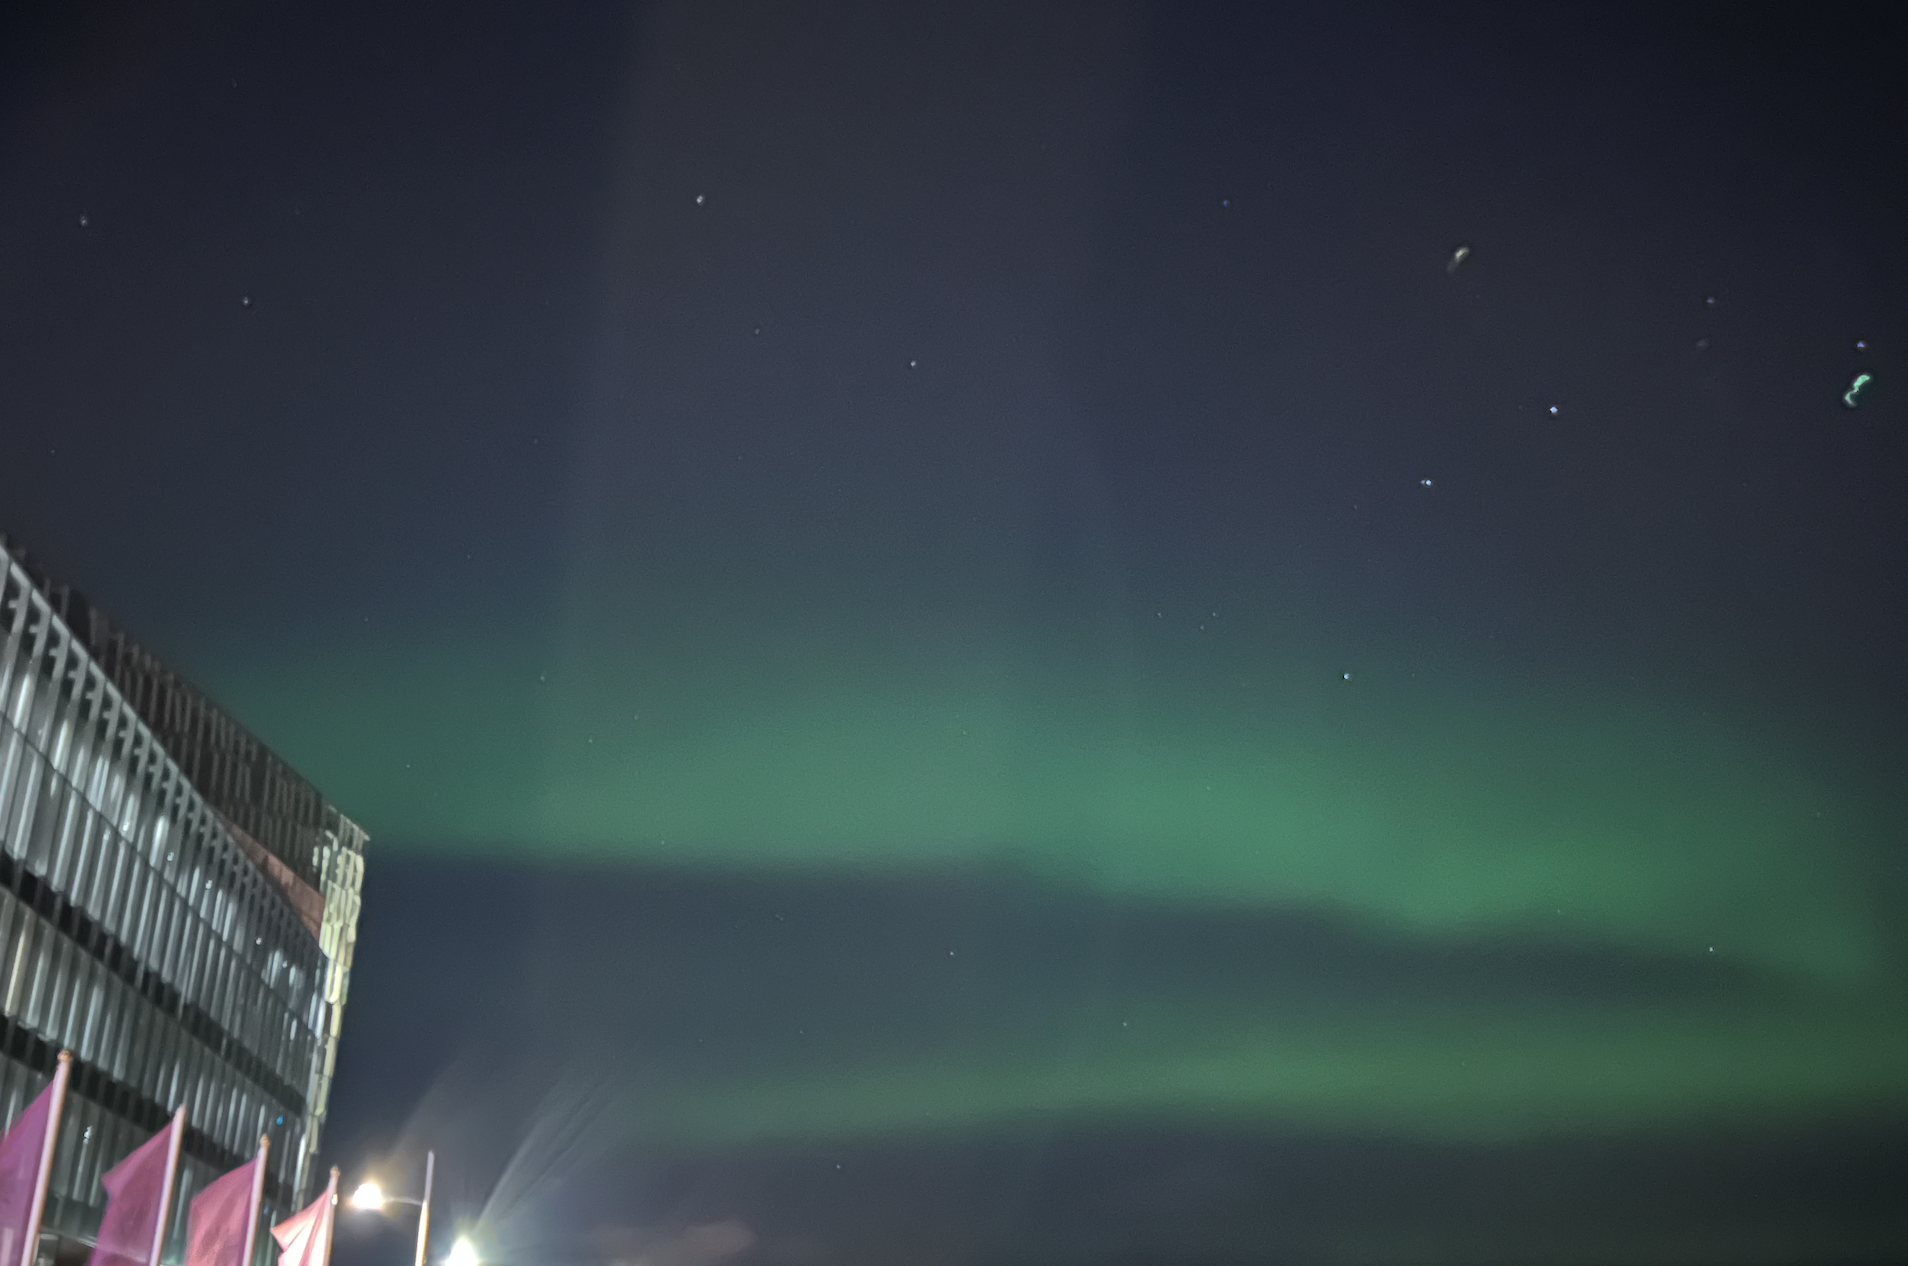
Northern Lights in Reykjavik
Faint lights, almost entirely invisible to the naked eye

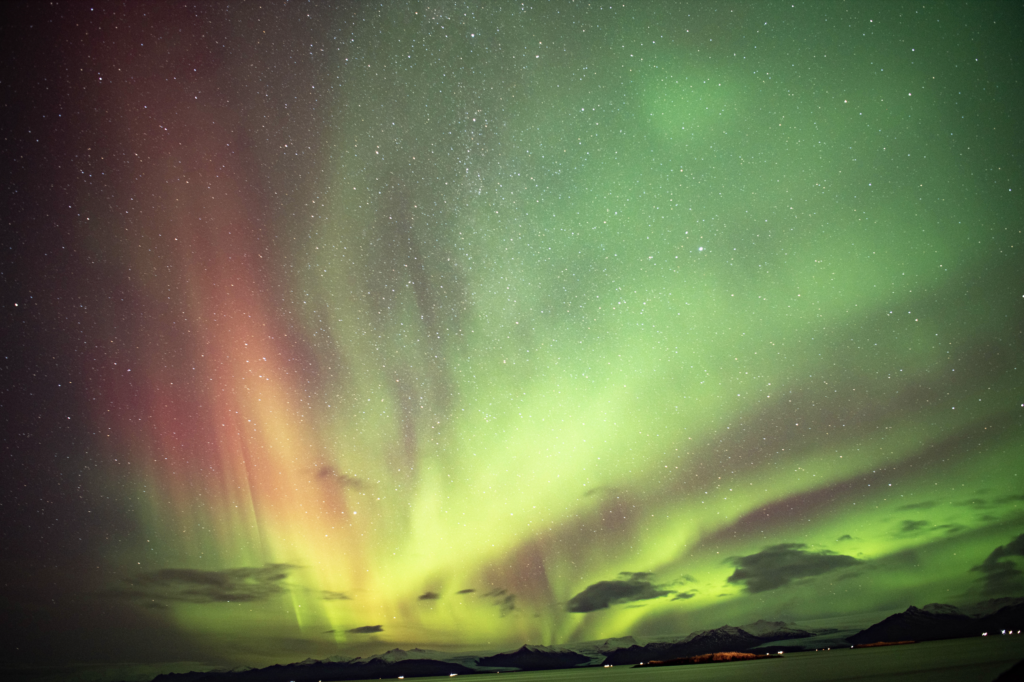
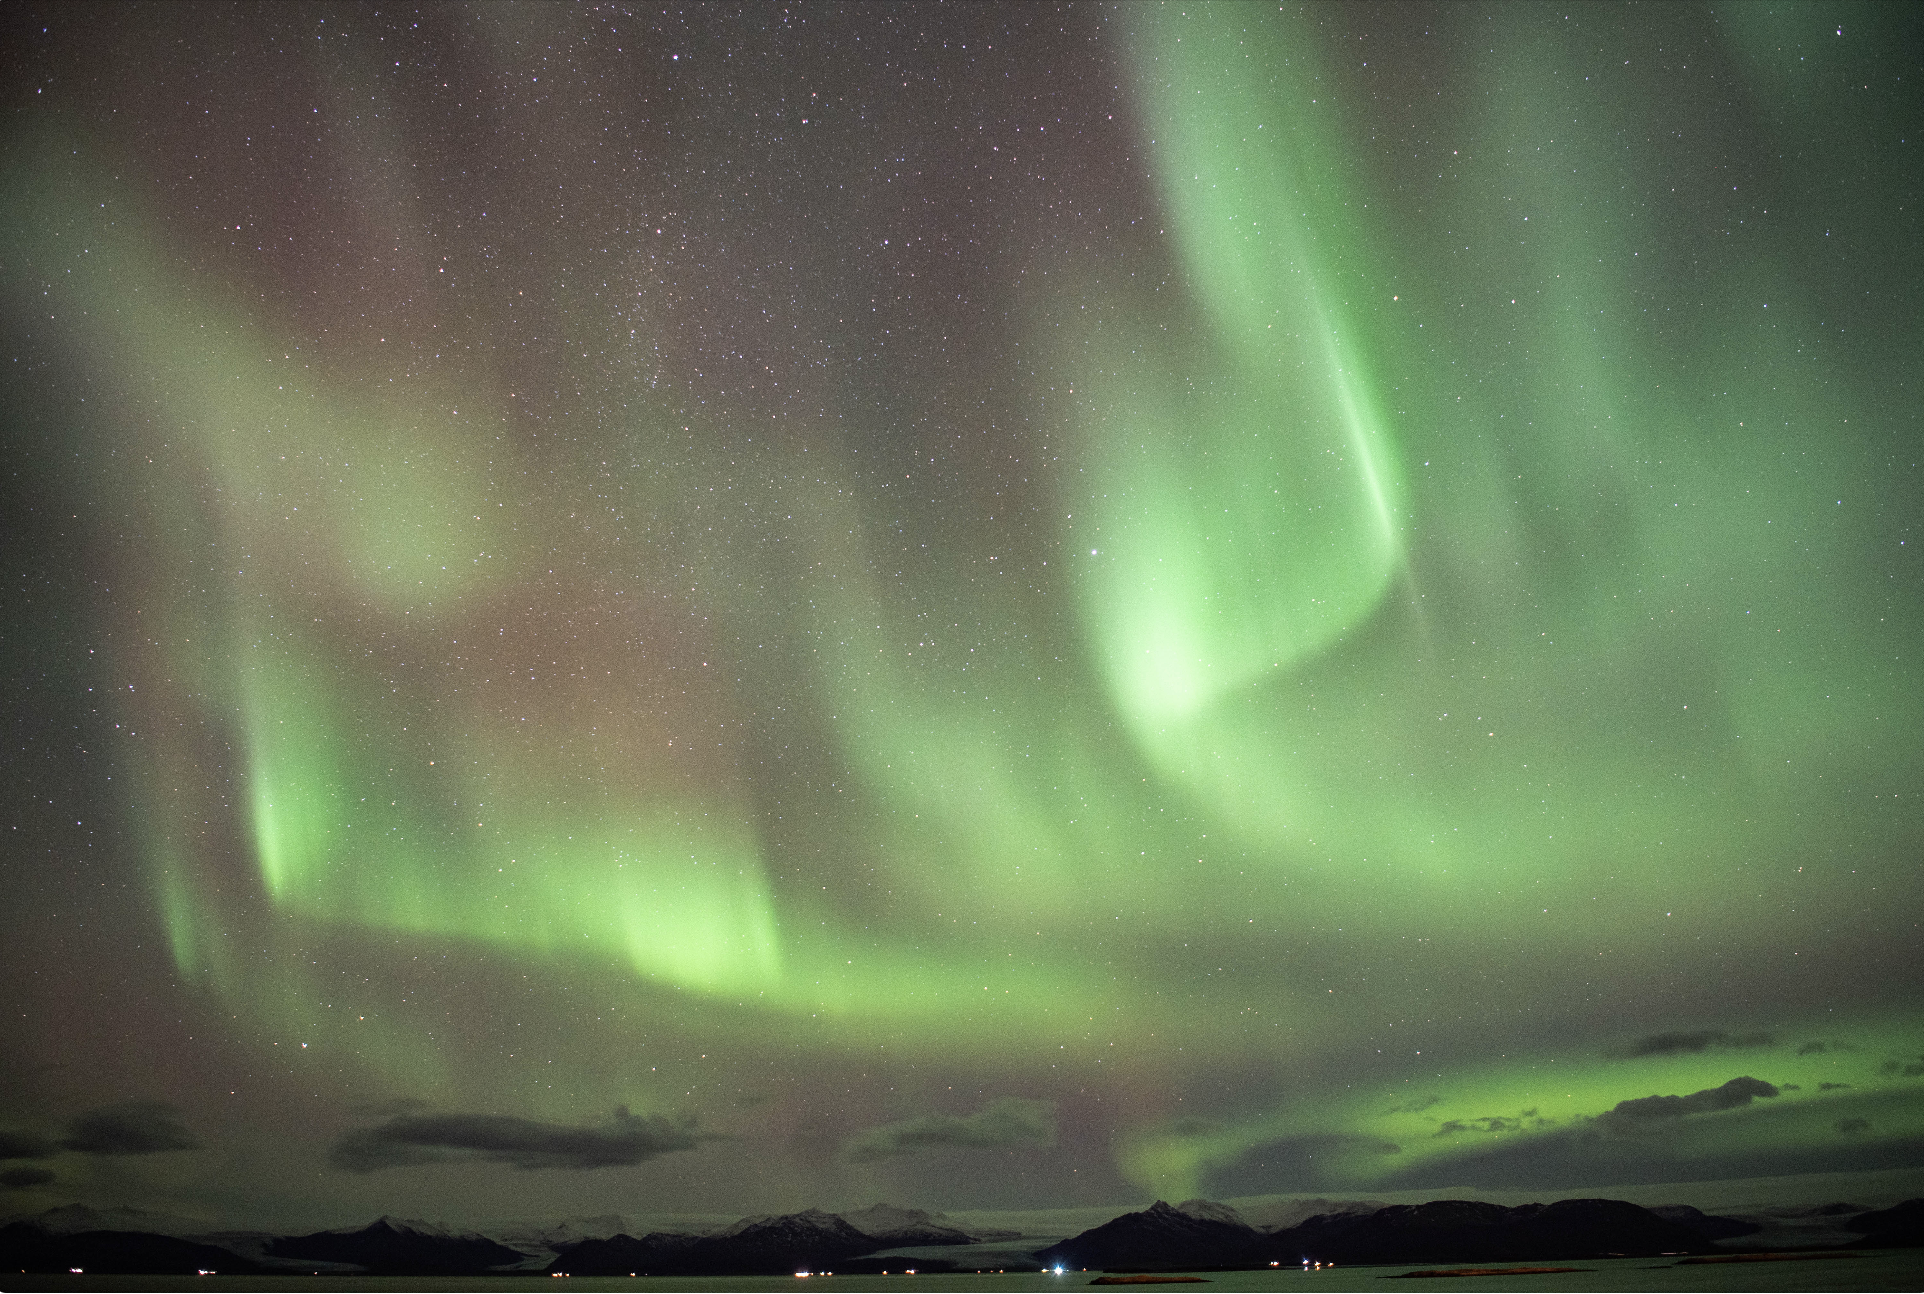
Northern Lights in Thingvellir National Park
Brilliant green spirals in the dark night sky, with no light pollution
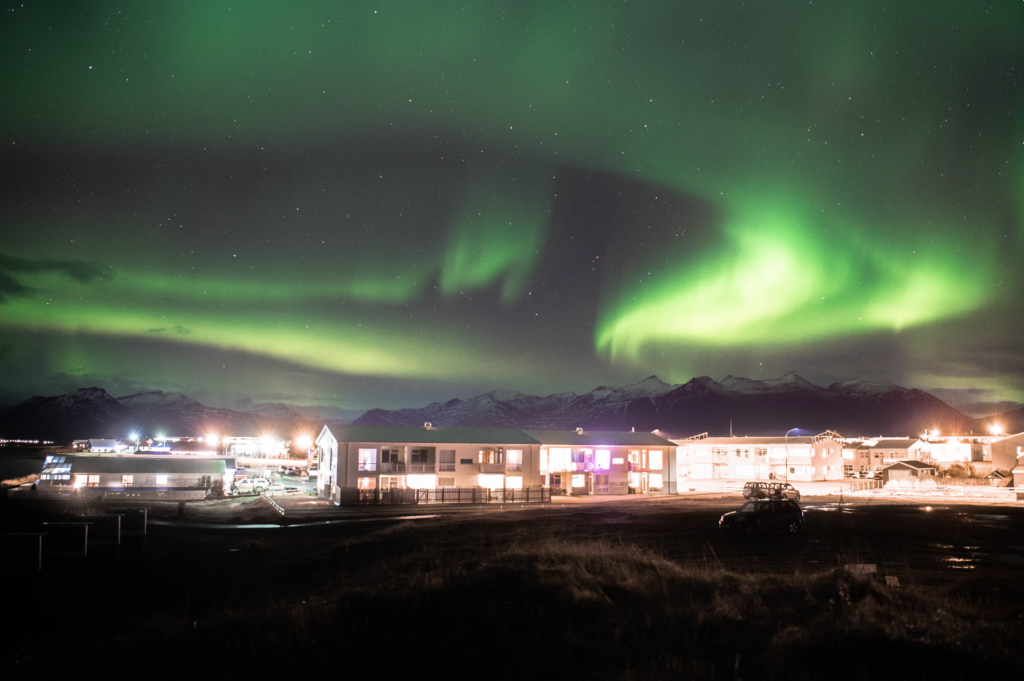
- Clear skies – The Northern Lights can only be seen when the sky is only partially cloudy, or clear. Cloudy skies will obstruct your view of the Northern Lights.
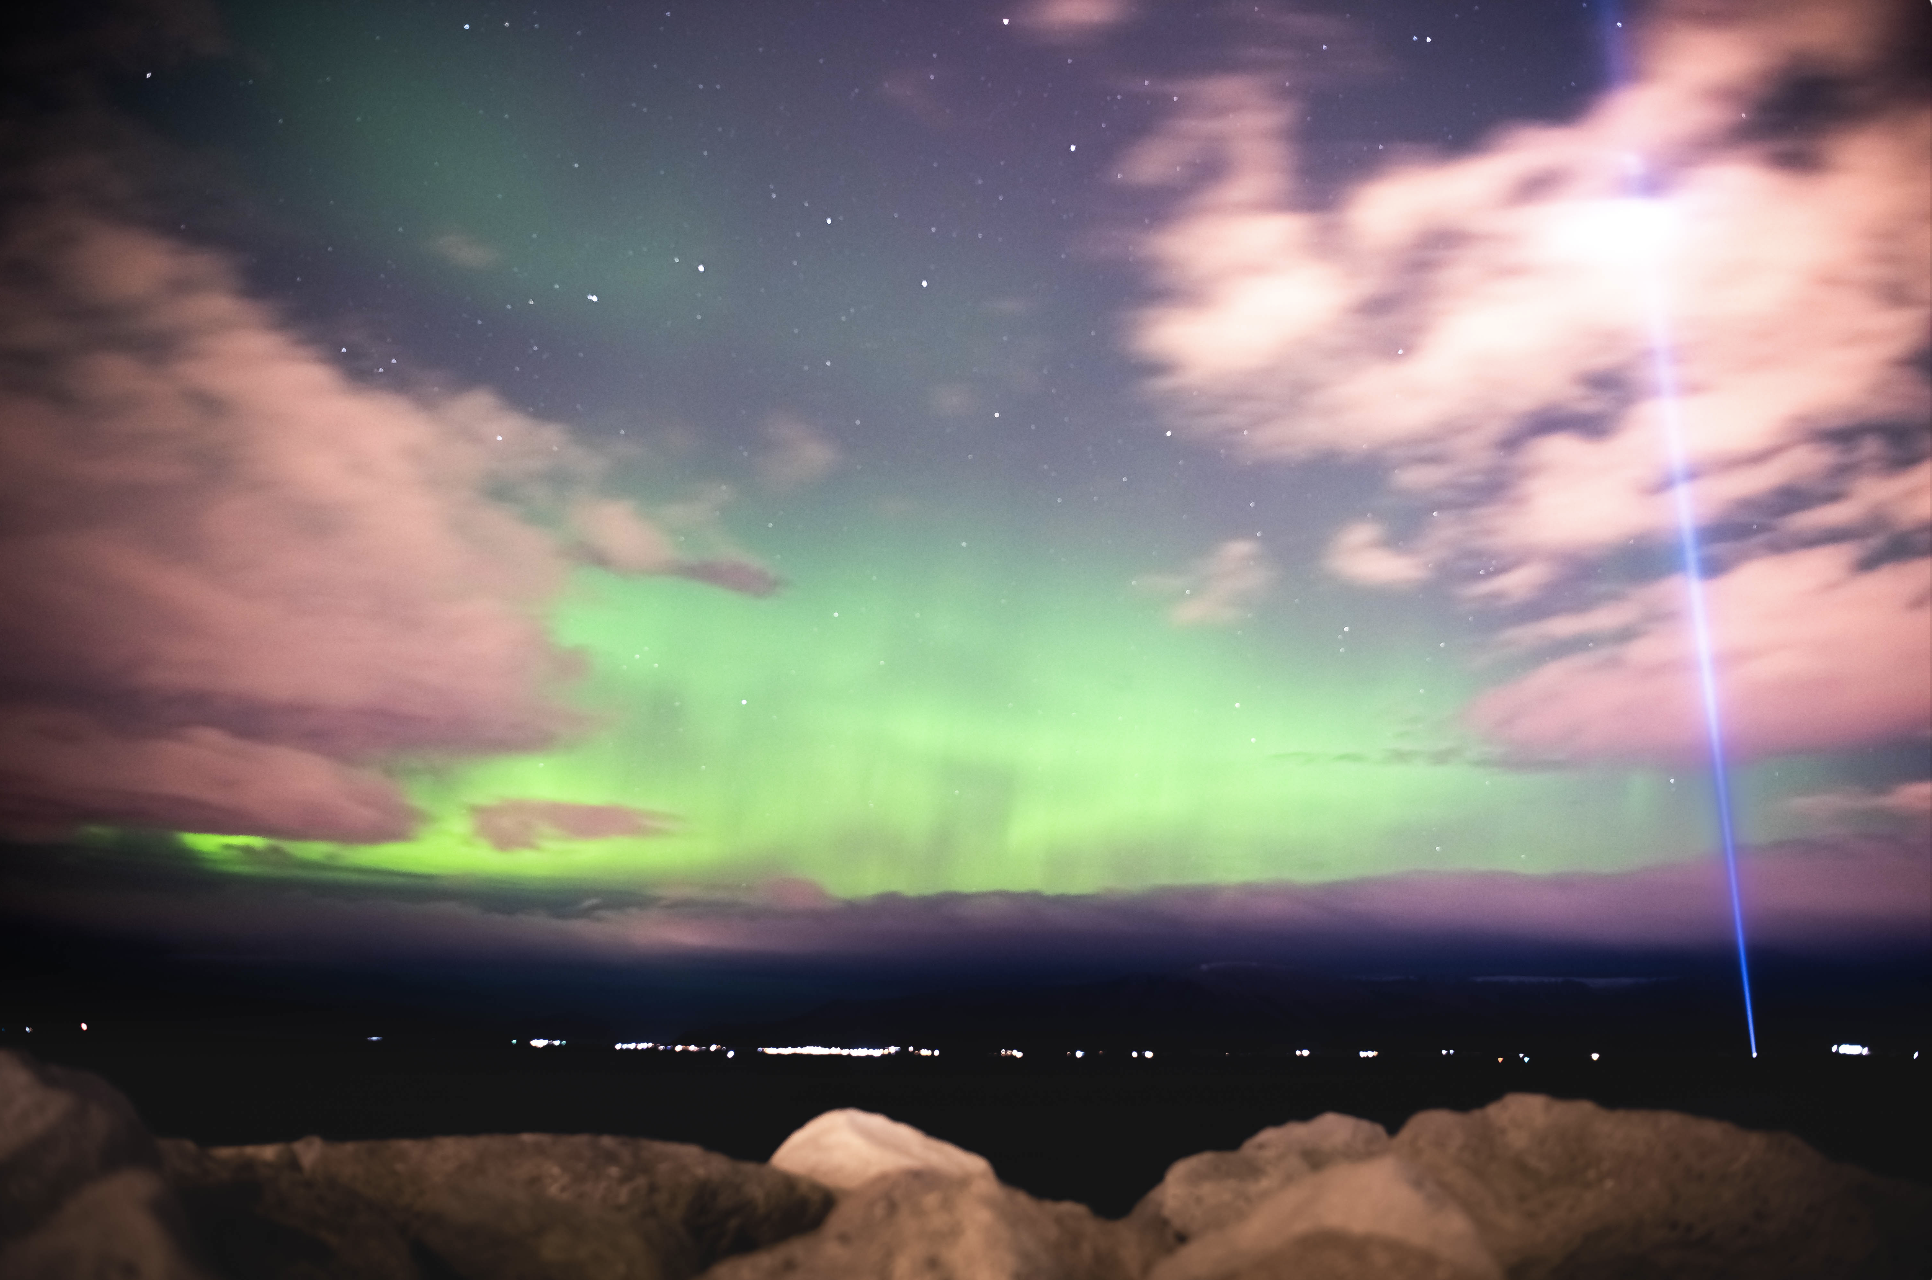
The Northern Lights with Partial Cloud Coverage
No Northern Lights a few minutes later, after full cloud cover
- Solar activity – The intensity and frequency of the Northern Lights depend on solar activity. When the sun is active and releases a lot of charged particles, the Northern Lights can be more intense and frequent.
- Magnetic field – The Earth’s magnetic field plays a role in the formation of the Northern Lights. This is another reason why northern cities, closer to the pole, are better for seeing the Northern Lights.
It’s important to note that even if you have all the necessary conditions, seeing the Northern Lights is not guaranteed. It is a natural phenomenon that can be unpredictable, so patience and luck are also essential. It’s recommended to plan your trip for several days or even a week to increase your chances of seeing the Northern Lights.
How can I find the Northern Lights?
Keeping the above conditions in mind, there are a few tools available to help you find the Northern Lights.
- Your phone’s integrated weather app
- The first thing to do is check the weather in the locations you want to shoot the northern lights. If it’s supposed to be raining or showing lots of clouds, it’s a low chance of seeing the Northern Lights
- Check out a Northern Lights Forcast App
- The website https://auroraforecast.is/ can help you track the KP-index and cloud cover across the whole country of Iceland
- Apps like My Aurora Forecast are a great way to see the aurora forecast worldwide and receive alerts for your location
- Take a Northern Lights tour
- Professionals in the area are happy to take you out to see the Northern Lights! They often use advanced tracking information to give you the best chance of seeing the Northern Lights, and will often allow you to go on the tour again for free if you don’t see them your first night.
- I took the Reyjakvik Excursions tour to see them at Thingvellir National Park and our guide was full of knowledge. I would say it was absolutely worth it because the aurora in Reykjavik that night was very dim.

What You Need to Photograph the Northern Lights
A lot of websites will advise you that you have to have the best photo equipment, a super strong tripod, a remote shutter, and more. I’m here to tell you that while these things will make photographing the Northern Lights easier, they aren’t absolutely necessary. So what do you need to photograph the Northern Lights?
Necessary: A Camera (or Phone)
That’s it! A DSLR or mirrorless camera body will allow you to get the best photos because you can manually adjust the shutter speed, aperture, and ISO. I use the Nikon D750 and it’s been my trusted travel companion since 2017.
With current phone models, you still have a chance to capture the Northern Lights, like this photo I took below on my iPhone 13 Pro
Advised: A Wide Angle Lens
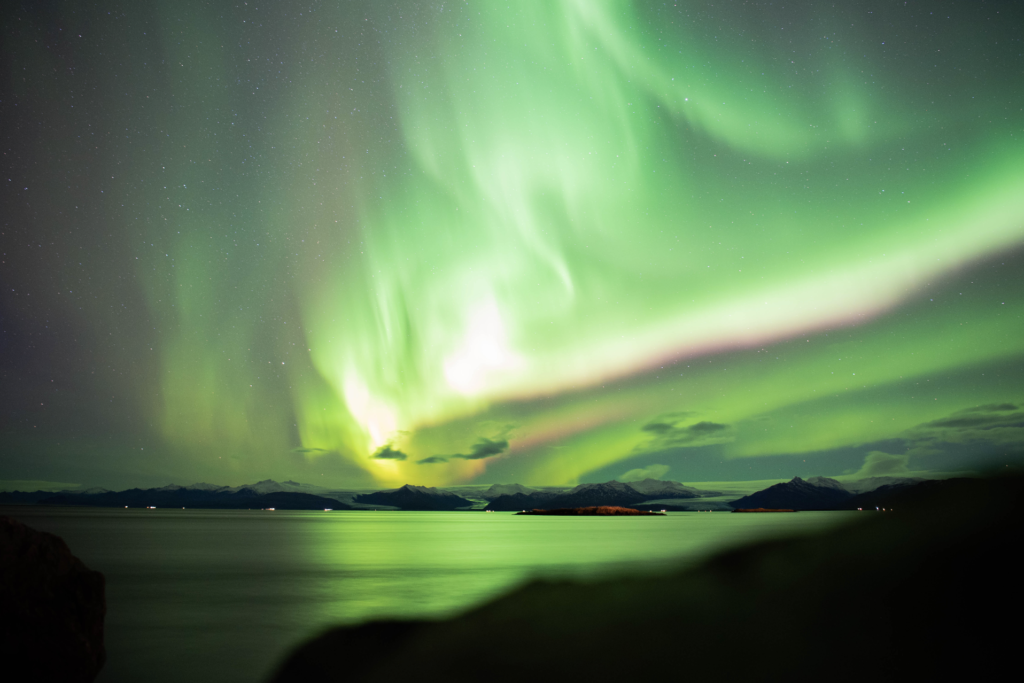
The Northern Lights have a mind of their own! One minute you might be seeing a small green streak and the next, they are dancing across the entire sky. For this reason, you want as wide of an angle as you can get.
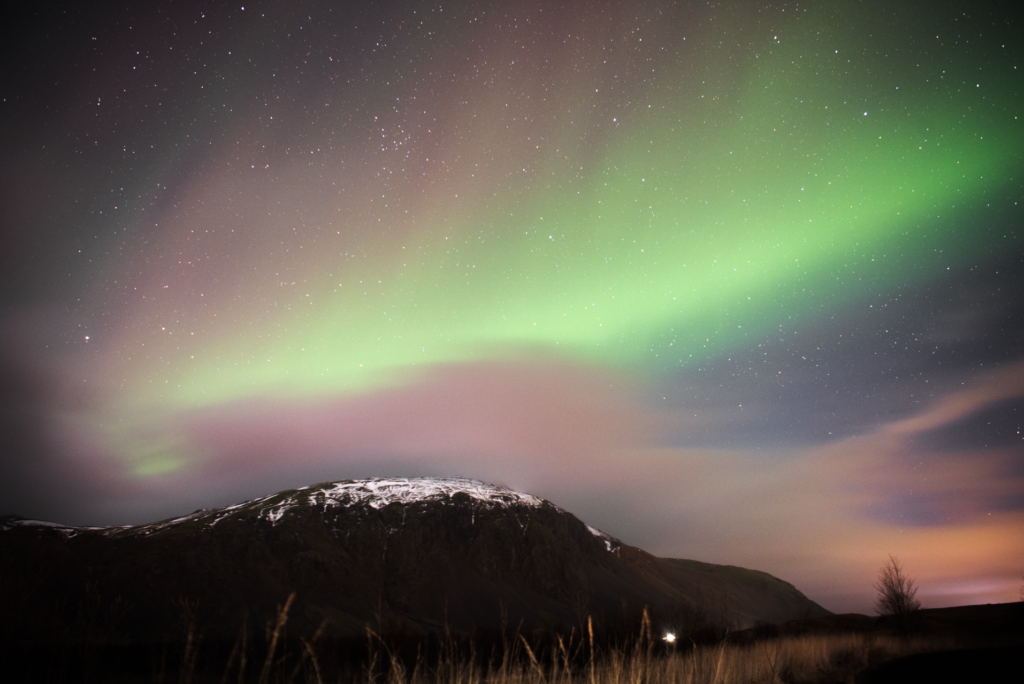
My personal favorite is the Nikon 24-70mm f/2.8. Almost every photo I take is with this lens – I love its versatility and it proved perfect for capturing this incredible aurora arch.
Advised: A Tripod
The first time I photographed the Northern Lights, I didn’t have a tripod. While I still was able to capture gorgeous photos, it took a lot more effort to get the shot I wanted. The second time I photographed the Northern Lights, I brought a Cullmann 52100 Alpha 1000. Its lightweight and compact model was perfect to travel with and allowed me to set up quickly for this photo, as the lights were only out for a few minutes.

If you have more room in your luggage, I suggest bringing a more heavy-duty tripod. The lightweight tripod did wonders on our first night seeing the lights, but when we got an unexpected show in 40+ mph winds, my travel tripod couldn’t stand the wind and all of my shots ended up blurry.
Advised: A Remote Shutter
A remote shutter button is a great tool for any photographer. It allows you to capture photos of yourself in the scenery or, in the case of the Northern Lights, keep yourself from shaking the camera when you hit the shutter button.
For my Nikon, I use the AmazonBasics Wireless Remote Control. It’s one of the simplest remote shutters you can get – with just the click of a button, your camera will take a photo with the settings you have programmed.
VERY Advised: Warm Clothes
Having the right photography gear doesn’t always mean having camera equipment. When it comes to photographing the Northern Lights, you’ll likely be outside for long periods of time in very cold temperatures. Make sure to dress in lots of layers, and bring a hat, gloves, and winter boots to keep yourself warm. If you get too cold, head indoors or into an enclosed space away from the wind, such as your car.
Remember – getting the shot is never worth compromising your safety!
How to Photograph the Northern Lights without a Tripod
Most photographers will tell you that a tripod is absolutely essential to photographing the Northern Lights. I’m here to tell you that’s not the case. If you’re reading this before your trip, preparing yourself with a tripod will make your experience photographing the Northern Lights much easier and you can be more intentional with your composition.
If you do find yourself under the Northern Lights without a tripod, you can still get stunning photos. All you need to do is find (or make) a flat or semi-flat surface. Check out your landscape to find your options.
You could:
Set your backpack on the ground or a picnic table, and lean your camera up against it to the sky. You may want to shuffle the stuff in your bag around to stabilize your camera. I took this photo with that method:
Find a rock on the ground, and lean your camera against it towards the sky. I took this photo on a rock:
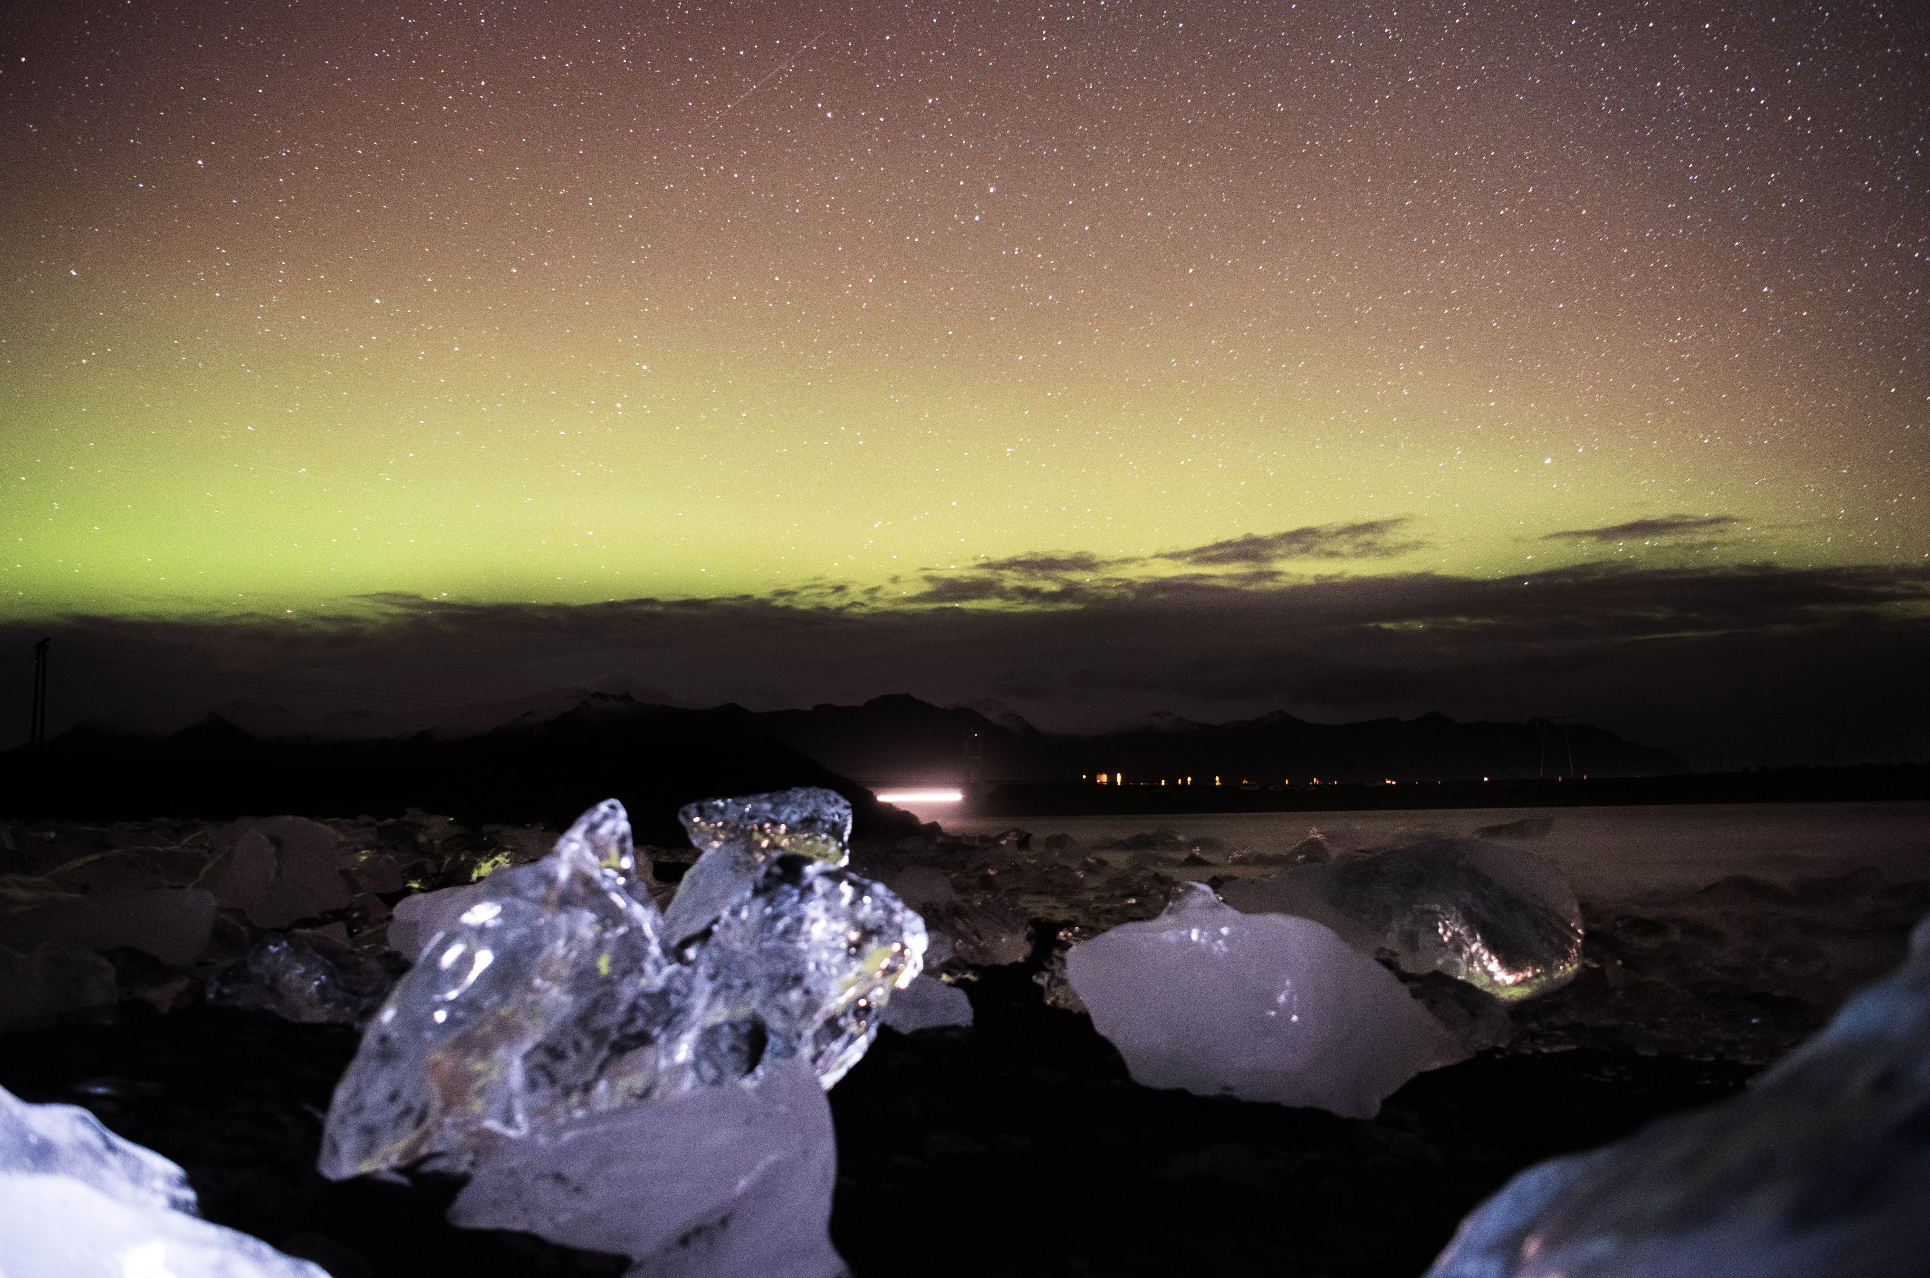
Lucky enough to see the Northern Lights at Diamond Beach? Don’t shy away from the ice itself. It’s not advised to do this for more than one or two shots, as the cold can kill your camera batteries, but in moderation, you may be able to capture a shot like this:
I still advise bringing a tripod, but if you don’t have one with you, you have options.
Get creative and try to find the most stable spot for your gear!
What Camera Settings Do You Need to Photograph the Northern Lights
These step-by-step camera settings form the basics of capturing the Northern Lights on camera:
- Set your camera to manual mode
- Switch your focus to manual mode, and set to the infinity marker
- This will allow your camera to focus out into the sky
- PRO TIP: Take a silver sharpie and mark this spot on your camera. This will allow you to find it again easily if it gets bumped out of focus
- Set your aperture to the widest possible setting (or lowest number)
- Try setting it at 2.8f or lower.
- You won’t need to touch this setting again.
- Set a long shutter speed
- This will allow your camera more time to let light in, also known as a long exposure.
- Start with 10-15 seconds and adjust accordingly.
- If your picture is too bright, set a faster shutter speed
- If your picture is too dark, set a slower shutter speed
- Set a moderate ISO
- The aperture and shutter speed should be doing most of the work to let light in, but you still might want to add a bit more. However be careful, as setting the ISO will cause a lot of noise on your pictures.
- Start with an ISO of 800 and adjust accordingly
- If your picture is too bright, lower the ISO number
- If your picture is too dark, raise the ISO number
- Hit the shutter and wait
- Whether you manually hit the button or use a shutter release controller, it’s important not to bump your camera. If you do, the photo will be blurry
- Be patient and keep shooting
- The Northern Lights are unpredictable. Staying in the moment and experimenting with your setting will help you to capture stunning Northern Lights photos.
In conclusion, photographing the Northern Lights can seem intimidating for first-time photographers, but with the right knowledge and preparation, it can be an unforgettable experience. To start your journey, make sure you know the right location to visit, the season, and the conditions needed to see the Northern Lights. Once you’ve made it to your location, have your camera (or phone) ready to capture those stunning shots! While having the best camera equipment, such as a wide-angle lens, tripod, and remote shutter release, is advised, it is not entirely necessary. Check your camera settings and sit back – with a little patience and luck, you too might be able to capture the glorious Northern Lights!
Comment below – have you seen the northern lights before?

I’m amazed, I must say. Seldom do I encounter a blog that’s equally
educative and engaging, and without a doubt, you have hit the
nail on the head. The problem is something too few people are speaking intelligently about.
I am very happy that I stumbled across this during my hunt for something regarding
this.
Way cool! Some extremely valid points! I appreciate you penning this
write-up and also the rest of the website is really good.